Soooo....pinterest got me. Again.
I first started seeing bird nest necklaces on pinterest a few months ago, and thought they were just the sweetest thing! I found THIS tutorial on Sarah Ortega's blog, and decided to put my own spin on it.
Supplies:
-necklace chain
-jewellery wire (I used 24 gauge...but you could use 20 gauge for a thicker look)
-beads/plastic eggs
-xacto knife (optional)
I found all of these supplies at Michael's, and was so stoked to discover that they carried little plastic eggs! I had seen all sorts of beads used for these types of necklaces, but I absolutely fell in love with the idea of having "actual eggs". (I found them in the floral accessory section of Michael's).
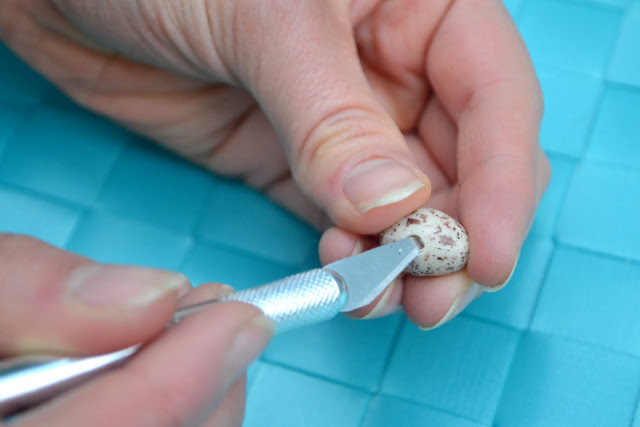
Since the eggs didn't have pre-made holes like beads do, I had to make my own using an xacto knife. I poked a hole on each side of the egg along the seam, and then carefully twisted the knife to cut out a small hole.
1) Slide your first egg onto your wire about 6ish inches from the end, and twist the wire around itself to keep the egg in place. 2) Repeat with the next two eggs, and tuck the end of the wire up so that it's not poking out (you may need to trim it a bit if you have quite a bit left over). 3) Start looping your wire around and around the eggs, forming the nest. 4) Once you have several loops done, I start looping the other end of your wire up and around the nest, to help form a more stable shape.
5) Once you're happy with the size and shape of your nest, make sure you have about 2-4 inches left to string on the necklace chain. 6) Thread the wire through the last loop on both of the ends of your chain. 7) Make another twist with your wire to secure the chain (otherwise it might slide around). 8) Finally, tuck the end of the wire into the nest so it's not poking out....and you're done!
These are so quick and easy to make, and make such lovely presents! I hope you enjoy this diy!
ps: kelsey ♥
ps: kelsey ♥


I love this! Thanks for posting this necklace DIY!
ReplyDeleteGood job Kelsey
ReplyDeleteSo cute! I love the one you made for me :)
ReplyDeleteYour necklace looks wonderful! I love your version of it. I’m glad you liked my tutorial, thanks for posting. Cheers!
ReplyDeleteThank you so much!!
Deletethis is too cute!
ReplyDeletethis would also make a good mother's day present!