
My mom found this great DIY project on a blog called Artsy VaVa, so we decided to spend Mother's Day together collecting materials and making them! We had a lot of fun picking out tissue paper with fun patterns, and interesting charms to go on the votives.

We used empty leftover jam jars and they were the perfect size! A taller olive jar would also work really well, especially if you wanted to make it into a vase.
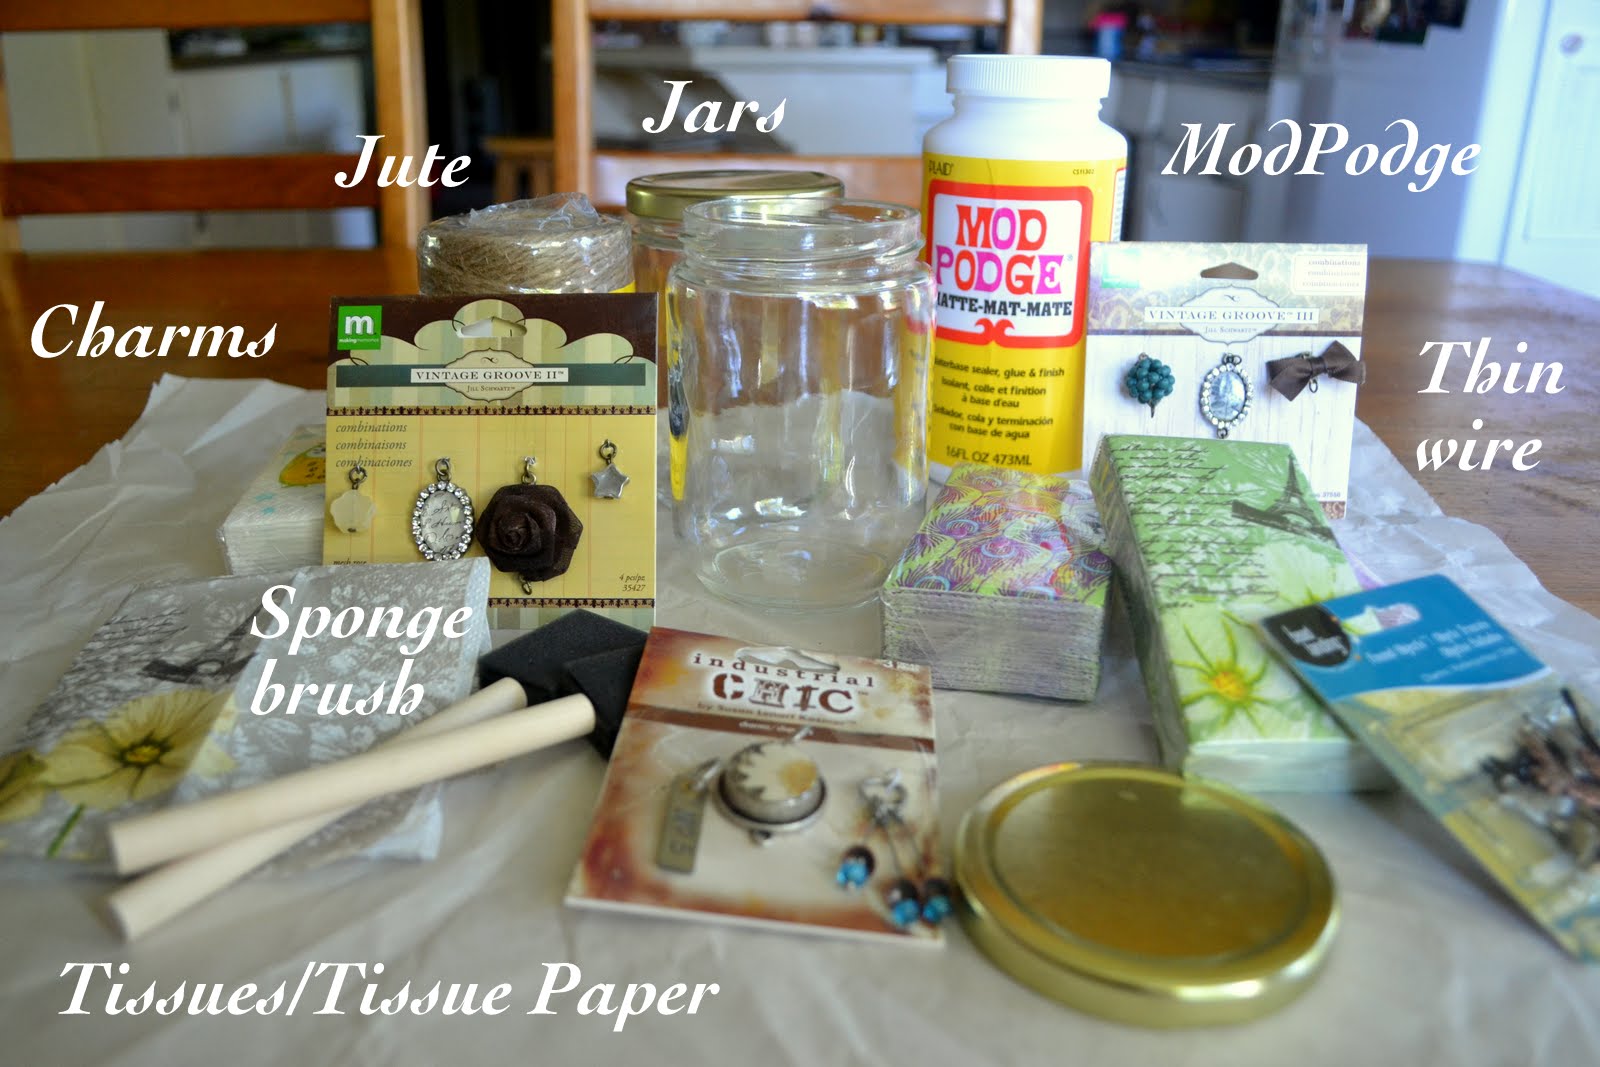
Our supply listed included:
Our supply listed included:
We found some really cute tissues to use that have the Eiffel tower on them. They came in white, green and purple. We also got some with owl patterns and peacock feather patterns. We weren't able to use all of them this time, but we will definitely be making these again!
The first thing we did was pull apart the tissues that we wanted to use for the outside of the votive. You want to glue on just one layer of tissue. At first I didn't realize that some of the tissues were three ply, so even though I had separated one layer, two still remained, so on my test jar the layers started separating, and fell apart. So make sure you are only glueing one layer down.
Once we had one layer of tissue ready to go we started applying ModPodge onto the jar covering a little bit at a time. As we covered the jar with ModPodge, we wrapped the tissue paper around the jar. One piece of tissue wasn't quite enough to cover one jar, so we cut a piece from another tissue and overlapped them a tiny bit. My mom also used tissue paper (rather than facial tissues) and she said that it worked great! The ModPodge went on easily, and there was no tearing).

The top doesn't need to be perfect, as it will be covered with jute, but make sure the tissue wraps around the bottom. For the very bottom of the jar we cut out a little circle and ModPodged it right on.

As soon as we had all the tissue stuck on, we let it dry for about 5 minutes, and then put a layer of ModPodge over the entire thing. I found the easiest way to do this was to stick my whole hand in the jar so I didn't have to touch anything sticky.

Then using thin metal wire we attached a charm. In this case it was a little bird. We twisted the metal around the back of the jar.

Then starting at the back, we wrapped the jute around the top of the jar 6/7 times (we tucked it into the metal wire at the beginning to get it to stay). When we were happy with how it looked we glued the jute to itself at the back of the jar.

We put a tea light in it, and it worked so well as a votive.

They also work great as flower vases! We used paper napkins for the jar below, and we decided it was probably too thick for light to shine through, so voila! A new vase!

This is definitely a project I will do again! It is fun, easy, and would make a great gift!
ps: jordyn ♥
These are great! I love the look of these!
ReplyDeleteWow, those are extremely adorable!! I love them. :)
ReplyDeleteErin
writedreamrunsing.blogspot.com
Easy and fun!
ReplyDelete