

It's your lucky day! We decided we should make something festive for St. Patrick's Day...so here we present you with: mint nanaimo bars! We thought adding a minty green twist to one of our favorite recipes would be the perfect St. Patty's Day treat. And boy is it good! Mint + chocolate is the bomb.

Now I've included the modified recipe for these minty bars, but check out the original post here for more basic tips and photos!
Nanaimo Bars
Bottom Layer:
1/2 cup butter [very soft]
2 tablespoons cocoa
1 teaspoon vanilla
1 cup unsweetened shredded coconut
5 tablespoons white sugar
1 tablespoon ground flax seed mixed with
3 tablespoon of water
2 cups graham wafer crumbs
Middle Layer:
4 tablespoons softened butter
3 tablespoons milk (or cream)
2 tablespoons vanilla custard powder
2 cups icing sugar
1/4 tsp mint extract (add more to taste if you really like your mint!)
green food colouring (I used gel, and it worked like a charm!)
Top Layer:
1 cup chocolate chips [or 6 baking squares]
1 tablespoon shortening
Instructions:
Step 1
1. Place melted butter, cocoa, vanilla, sugar, and flax seed mixture in a bowl. Stir mixture until creamy.
2. Mix wafer crumbs and coconut into the cocoa mixture.
3. Pack into an 8x8 pan. I usually line the pan with parchment paper, and when I am ready to cut the bars, I just lift it out, and place it on a cutting board.
4. Refrigerate until the bottom is solid (about 30 mins).
Step 2
5. In a seperate bowl, mix butter, milk, custard powder, icing sugar, and mint extract together. Add a bit of green food colouring until desired colour is achieved.
6. Spread over bottom layer.
Step 3
7. Melt chocolate chips and shortening together either in a saucepan or in the microwave; be careful not to burn! The shortening will ensure that the chocolate layer isn't too solid, so it wont crack when cutting.
8. Spread chocolate evenly over middle layer.
9. Refrigerate for approximately 5 mins.
Step 4
10. Once the chocolate has begun to harden, I like to score it with my knife. This makes it easier to cut after it has totally hardened.
11. Place nanaimo bars back in the fridge for at least 30 mins.
12. Once they have completely hardened, lift the parchment out of the pan onto a cutting board, and using a large knife, cut the nanaimo bars all the way.
13. Enjoy!
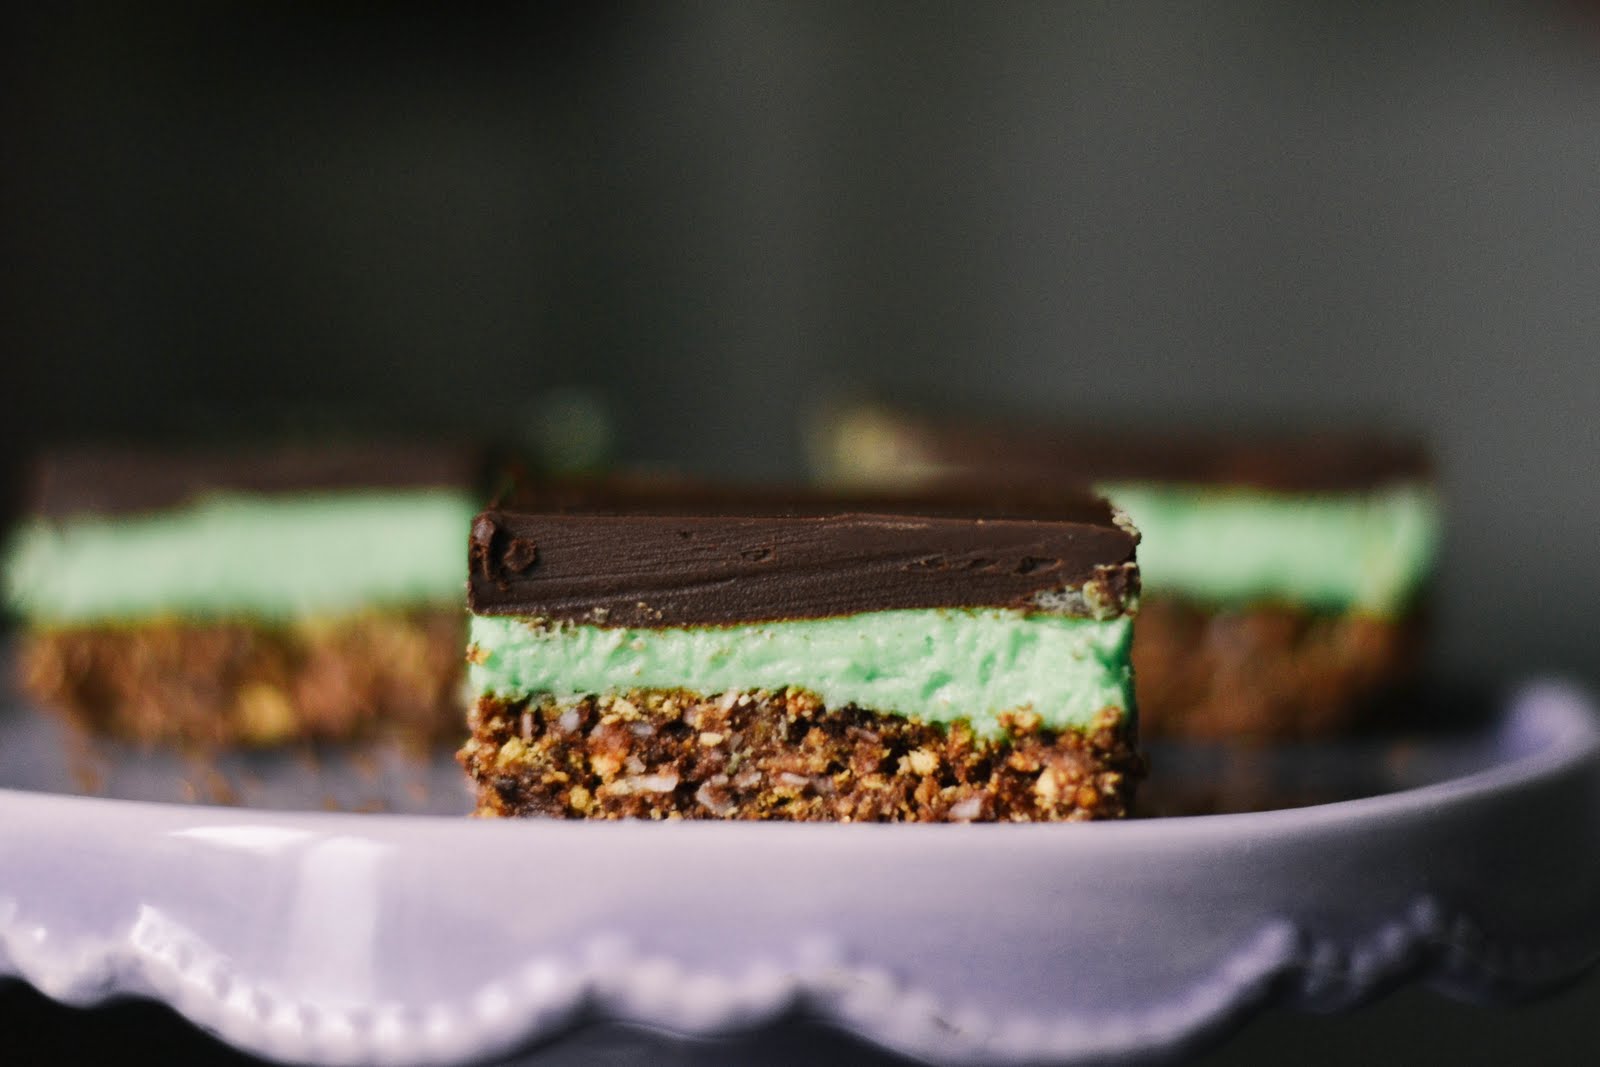
I love the pop of colour on these babies...and they're sure to be a hit at any party!


These would make a wonderful dessert no matter the occasion, and are a nice change from our original version!
Enjoy! And Happy St. Patrick's Day!
p.s. ♥ kelsey
These look radically good. I want to eat one right now!
ReplyDeleteYumm, love these, very yummy but the bottom didn't stay on...missing an egg or something?
ReplyDeleteHey there!
DeleteWe don't like to use raw eggs if we don't have to, and this recipe doesn't temper the egg. So we swapped the egg for flax seed and water, which should act as a binder.
However sometimes little things like how much your butter is melted, or the consistency of your crumbs can change how the base sticks together. You could try adding a little bit more water, but that can make the base a little bit too runny.
If you find you aren't happy with the flax seed and water, you can sub them out for one large egg.
Hope this helps!